3D Name Tag

Are you ready to add a personal touch to your workspace? This tutorial will guide you through the process of creating your very own custom desk name tag using 3D printing technology. Whether you're looking to spruce up your office, make a unique gift, or just explore the endless possibilities of 3D printing, this project is perfect for you.
Example Print
Types of letters

Print finish

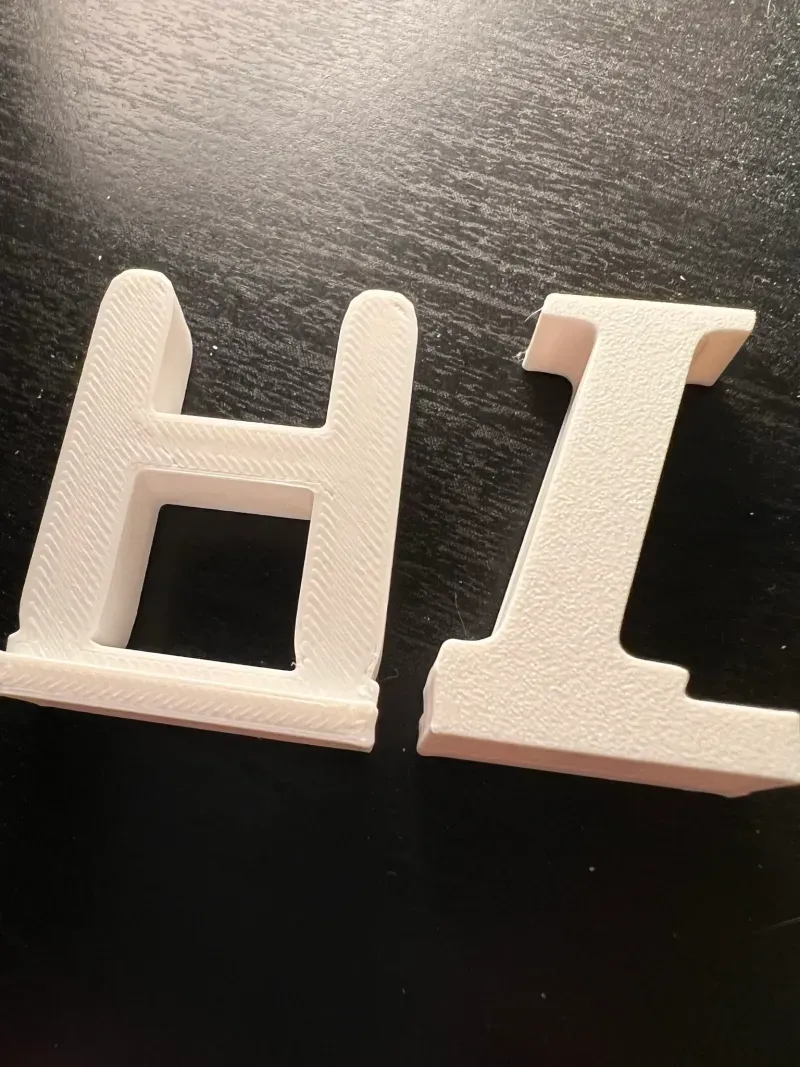
Print finish letters have the readable surface of the letter as the top layer in the 3d print. This gives it a very 3D printed look. This example is a print finish because the surface facing away from us is what touches the print bed (no supports if the little edge faces up).
Bed Finish

This letter is a bed finish print since the readable side of the letter was touching the bed during printing (the side facing you). This could look cool if you have a textured bed since the print won't have the 3D printed look. It's totally preference.
Finish Compareison
This picture shows the differences between the finishes (H print finish and I bed finish).

I have provided two types of letters:
Bed-Finish Century Schbk Letters
These letters are bed finish and in the font Century Schbk Bold Italic
Print-Finish Ariel Rounded Letters
These letters are print finish and in the font Ariel Rounded bold.
These two types can easily be mixed (I did it for the name plate on my desk). If you want to change whether they are print or bed finished you can remove the lip on the current side of the letter and move it to the other (dimensions provided in the design guide).
Stand Types
All stands have end caps and middle pieces. They slot together using little printable pegs that go into the holes. The letters usually overlap the gaps which also helps hold them in place.
Single Rail Stand

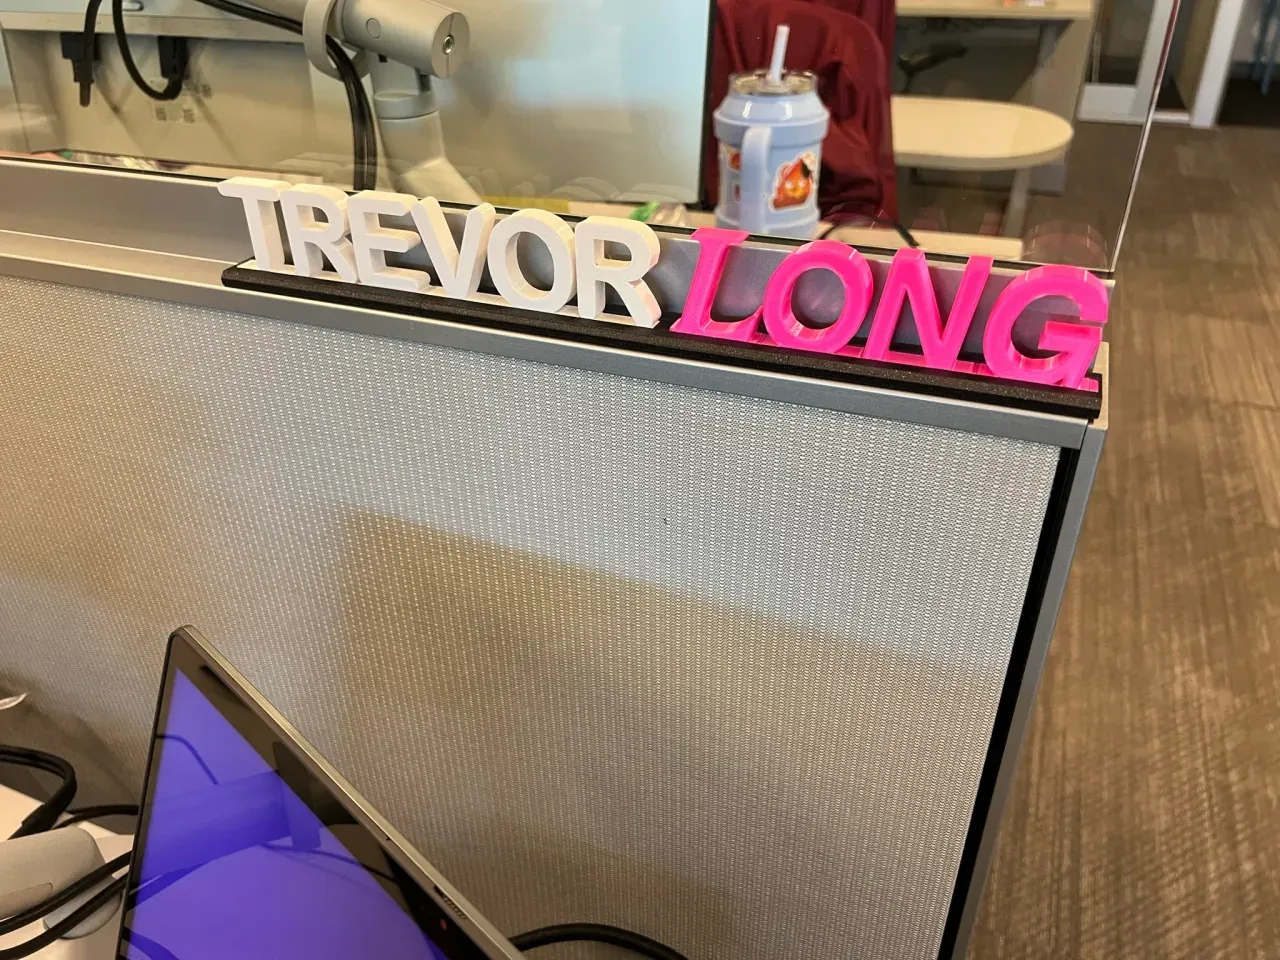
This stand can hold one row of letters or one row of background pieces. The “Trevor Long” tag I printed for myself uses these stands.
Dual Rail Stand
This stand has two identical rails, this can be used for either two rows of letters, two rows of backgrounds, or one row of letters and one row of backgrounds.

For example the “Jason” name tag picture uses this stand with one row of letters and one row of backgrounds. If you share a desk you could use this for a two sided name tag where each side shows a different name.
Spacers
Spacers come in various sizes and can be used to space out letters, words, or backgrounds.

Backgrounds

Background pieces mount into the stand rails and allow for a background to be placed behind your name. I have only provides a slanted background but I'm sure you could make some awesome backgrounds!
Overall Assembly
This image shows how everything fits together using a transparent stand.

Dimensions (All in inches! Sorry!)
My goal is to make this system super modular so that the community and yourself can create additional stands, fonts, and backgrounds! Here are the dimensions for the groove and the inserts into the groove:


If you have any questions about dimensions please let me know!
Print Settings and Final Notes
The parts fit together more easily if everything is PLA, that being said I had no issues putting PETG letters into a PLA stand. These are loose recommendations since these are easy parts to print:
- Layer height: 0.20mm Quality
- Infill: 10% Gyroid
- Supports: None
Naming scheme
- SR = Single rail
- DR = Dual rail
- -XXX = Size in inches
- Example: SR-150 is a single rail stand that is 1.5" long
I hope you enjoy these prints! Please feel free to make add on's compatible with this system and re-post them! It would be awesome if community created fonts, stands, and backgrounds made this system amazing! My goal is to create more in the future but right now I'm very limited on time. Happy printing!

